Wednesday, April 20, 2011

WOW......

Has it really been 10 days since my last post? I guess I have been busier than I thought. I haven't actually worked on the Lily in quite some time. I had some swaps to tend to. In fact I received back a quarter scale swap the other day and I thought I would share what I received.


Like the last swap I posted, this too was a furniture swap. It was a great swap !!!


This lovely slipper chair was made by Jene B and the desk was made by Fern R


The first bed was made by Cindy McD and the second by Tamara Z


This great chair was made by Kathy G and the couch was made by me.


The fantastic Modern chest and rug were made by Pat H and the chair by Ginger A


It was really a great swap....very talented people in that group. Glad to be there.

Sunday, April 10, 2011

Been Busy

Hi world.....haven't been around much this last week.....Just haven't been working on the house and had a lot of stuff going on. I had swaps to work on and I also had a virus on my computer. Everything is good now and I plan to do a lot of work on the house this week. I did go to Scrapfest which is a big scrapbooking event and found a couple of things that I can use for miniatures. Some very nice picture frames and some really tiny rick rack trim. Oh, and my friend Lori (who gave me all that great fabric), gave me the tiniest eyelets to use for 1/4 scale scene flower pots or something of that sort. My quarter scale club had an auction last night which was a lot of fun. I won a couple of items that I am sure will come in handy in a future scene. Looking forward to getting some work done on the Lily this week.

Tuesday, April 5, 2011

Today.....

......is Sand and Paint day.....I sand the wood, and paint it.....once dry I sand it again, and paint again......argh......but I did come up with a great way to dry the pieces. I took an old dish drying rack that we don't use and I place the wet items on it to dry. It's working out wonderfully.


Saturday, April 2, 2011

Why I don't like Greenleaf

I always said I would not purchase a house made by Greenleaf. The main reason is that they use very shabby wood. It's just not good quality, but I really liked the Lily, and bought it fully expecting bad wood. However, with one of the interior window trims it was just not workable. Here you can see two pictures of how bad the wood was.


The wood was literally crumbling as I tried to sand it, and the middle core of the wood was crumbling too....I had to make a decision on what to do about this piece of wood. I decided that it was a lot less stress to just recreate the piece with some basswood strips that I have.


First I used my mitre box to mitre the corners of the wood.

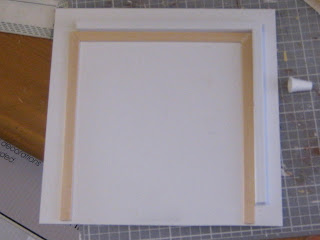
Next step was the glue the pieces together. I used my jig to make sure that the pieces stayed square. This particular window frame was for a double window, so I had to also glue in a middle piece of wood, so I used the window sashes in the frame to help me know exactly where to glue the middle strip. Here's the final result. Looks much nicer than what Greenleaf provided.

Walls are up

In my last post I mentioned that I got the rest of the interior walls up. The kitchen is walled in and so is the bathroom. Here you can see the Kitchen glued and taped to dry. And here the kitchen is with the wallpaper up. I really like how it turned out. It was a little awkward to paper because of the back of the stairs sticking into the room but I am impressed with how well it went together.....I usually make a mess of tricky stuff like that. The walls for the bathroom are up and I wallpapered the other side of the walls (the bedroom) before I installed the walls. It was a mistake because I made a large boo boo with the wallpaper as you can see in the second picture below. I'm going to put some corner moulding on that edge to make it look nicer.


Thursday, March 31, 2011

Finally....progress

I got quite a bit done on the Lily today. I finished wallpapering the foyer. The kitchen is now all walled in. The bathroom walls are up and the 2nd floor bedroom is finished being wallpapered. I had pictures but can't get them off of my blackberry.....which is a long story that no one wants to hear. Tomorrow I will get some pictures (with an actual camera) and post them. I felt very productive today :)

Monday, March 28, 2011

Mini Giveaway

There's a great Mini Giveaway at Hummingbird Miniatures. Follow the link below for all the information.


http://hummingbirdminiatures.blogspot.com/2011/03/choose-cake-competition-giveaway.html

Finished Window


My only work on the Lily today was to put in the foyer window. I really like the windows on this house as they are double hung windows. The foyer is starting to look finished.

Quarter Scale Swaps

I belong to a swap group and recently joined a Quarter Scale Furniture Swap. I got my first Quarter Scale dollhouse for Christmas and I love it, so I thought it would be great to start a stash of quarter scale items. This was my first quarter scale swap. I decided to make beds. So I made these cute fence post headboard beds. There was 7 people in the swap including myself. So I made 7, kept one and sent 6.


These are the items that I got back. One person dropped out, so I only got 5 items back. The blue bed was made by Leslie Robinson. The middle bed is my creation. The red bed was made by Fern Rouleau. The large dresser was made by Sheila Barker, the small cabinet made by Eva Palmer and the chest was made by Barbara Myers. Such talented women. I love them all.


Saturday, March 26, 2011

Now I see the progress

I've done a bit of work on the Lily in the last few days. I've wallpapered the 2nd floor bedroom and the living room. They turned out nicely. The first picture shows the bedroom. It's a nice pink colour. The second picture shows a picture of the living room walls. You can see the foyer through the archway in the far wall.


I decided to go ahead and put the last partition on the main floor. This was such a pain in the you know what. It's a wall with tabs, that is being placed where there is only room for the wall without the tabs. I had to use a hammer to slowly get it into place. It really mucked up my floor. Times like this make me thankful that I decided not to stain the floors and put the floor in later.


Now my foyer is closed in and I can only do work on it from the front door. Which is kind of tight. I'm glad I put the ceiling paper on prior to adding the last wall. I do have one small part to wallpaper still but that won't be a problem. I have to put flooring down, trim at the ceiling and baseboard, and put in the window. Then the foyer will be done. For some reason there is a little gap where the stair meets the floor but it doesn't seem to be putting any other walls/floors off, so once I put baseboard it will be covered up. It's really moving along now......

What a gift

Yesterday I got a wonderful gift from a good friend of mine, Lori. Her job gives her access to fabric sample books that would otherwise be tossed in the garbage. So she has generously passed them on to me.

It was like Christmas when I saw all the books that she gave me. Some of the patterns are a little large for miniatures, but a lot of them are perfect. They are a little thick for furniture upholstery but they would make amazing rugs.

I am so excited and thankful to Lori for thinking of me. Thanks Lori.


Tuesday, March 22, 2011

Progress

I don't feel like I am getting anywhere with the Lily. I work on it a little bit every day but I just don't feel any further ahead. I did wallpaper the living room and one of the bedrooms last night, and today was mostly painting the stairs and the parts for the foyer window.

I have realized through all this that I really do not like to wallpaper. It seriously stresses me out. That's why I tried to get as much done as I could last night. There is still a lot to do but I figured I would do as much as I could with a little walls up as possible. Cramped spaces make it hard to wallpaper.

Sorry no pictures today. I'm just very sick and tired this evening. Hopefully will get some up tomorrow.

Till then.

Sunday, March 20, 2011

Moving Right Along

Hi everyone! Well I was feeling a little better today and decided to work on the Lily for a while.

I finally finished the second staircase....man that thing gave me so much trouble. Nothing seemed to fit properly. Thankfully you really don't see the stairs of this staircase. You mainly see the back and side. Not that it doesn't look good, but if there are any imperfections, you won't really see them. I really like the built in shelves in the back of the second floor staircase.


I put in a partition on the main floor between the foyer and the living room. It gave me a bit of trouble getting it in the slots but it looks great now. It's starting to look like a house.


I got up the courage to wallpaper today. Because the foyer will be closed in soon, I have to complete that room before I can move onto the rest of the house. I had to first make sure that all the windows were painted inside and out. This house (unlike other houses) the windows are set on the outside of the wood. Other houses, the windows are set inside the window frame. This means that the wood would show through the window, so I had to make sure that all the wood was painted in the window frames.


Then I wallpapered the foyer......there still is another wall to close in the foyer but I am going to paper it before it goes in, and make sure that the whole foyer is done before I do that. I like how it turned out.


While I was on a roll, I decided to wallpaper the second floor hallway. It was a big space, and I needed to match up some areas which I found challenging......(wallpapering is NOT my thing...LOL) I eventually got it done, and I like how it looks. I can hardly see the seam.


I've been painting the stairs to prepare them to put in the house. I've nicknamed them the straw, 'cause they just suck up all the paint. It's going to take many many coats of paint. See you all tomorrow :)

Thursday, March 17, 2011

Wallpaper Details

Well, this cold has gotten the better of me, and I have put off any more construction on the house until I am feeling better. So, I thought I would share with you the details of each room's wallpaper. These colours look much nicer in real life, but this gives you an idea.

Top Row: Foyer, Living/Dining Room, Kitchen, 2nd Floor Hall


Bottom Row: Bathroom, Bedroom, Left Attic Bedroom, Right Attic Bedroom

For some reason the kitchen looks more blue here but it's actually sort of yellowish with pink flecks, and the Left Attic Room is more of a yellow colour too.

I can't wait to actually start putting the walls in. I love the papers so much.

Tuesday, March 15, 2011

Building Error puts stop to construction......


Ok, maybe the post title is a little dramatic, but there was a small error. The second staircase has a built in shelf on the back of it (one of my favourite things about this house), and I put the shelving part together last night.

Today when I did a dry fit of the shelving to the stair sides, the back of the shelves were too high, which would cause a problem fitting my risers and treads (as you can see from the 2nd picture).

I figured that this was a simple fix, just need to sand it down. After all, this wood breaks if you touch it right ?!?! So it should sand down easily. Well, let me tell you....there was cursing. I used my dremel first, that barely took down any of the wood, then I got out my bigger electric sander, and that did not work either.....Suddenly this became the strongest wood ever known to man. I ended up having to cut it down a little at a time with a sharp exacto blade, and even that was a struggle....But I am happy to say that I finally got the wood level, and my tread will not sit flush on the riser.

However, that being said, the stairs are still not together. I've got to wait for the glue to dry before I can start gluing in the risers and treads.

I did prime the house though, and that is one of those things that I hate to do so I am glad it is now out of the way.

Monday, March 14, 2011

eBay Find

I was on eBay earlier this evening and saw this nice kitchen cabinet. The description actually said: Kitchen & Dining Room Chinese Vintage Oriental Cabinet. I'm not sure I see how it is Oriental, but I thought it was super cute. There was only 1 bid on it, and it was sitting at $ 0.98 and was ending in an hour. I was quick to bid......I put my maximum bid at $2.00 fully anticipating that I would be outbid, but surprisingly I was the highest bidder at $1.03
It wasn't until after I placed my bid that I thought to look at the shipping cost....haha....probably should have done that prior to bidding. It turns out that this item is coming from Hong Kong, and shipping is $12.99 ......wow, wasn't anticipating that.....but what is done is done.

The hour passed and I had forgotten all about it......but saw my eBay tab still open. There it was....YOU WON THIS AUCTION

So, for $14 I have this very cute cabinet coming my way. I'm thinking that if it fits in my new house, I will paint it white and add a sink. Sometimes you find great deals on eBay but man that shipping......


Planning Day

I woke up this morning with a sore throat, so I don't much feel like building today. It will be more of a planning day. Before I can proceed with any more of the actual house building (still have the other staircase to do), I have to know what I am going to do with the foyer. The next walls that I put in will shut it off, and that's that. So I need to do as much in there as possible before I can go any further.

I decided that I wanted a pink and green shabby chic look for this house. Something really girly. I'm very excited to start doing some research. I also decided that I wanted to use scrapbook paper for this project because there is not much out there that I like in the way of dollhouse wallpaper. Even though I am not feeling great I decided to venture out in search of what I wanted. I looked at so much paper today.....exhausting, literally because I'm not feeling well.

My last stop of the day was Walmart, so I checked the scrapbook section and I found the perfect paper. It's a big paper pack by K&Company, it's their classic paper. It's perfect. Each sheet is more like cardstock than paper, and double sided. 36 sheets per pack, so I got two at $10 each. I should have plenty to complete full rooms, and many of the patterns are small enough for 1/12 scale walls. As well, my house is going to have a nice flow with all the coordinating patterns.

I will have to go through the packs later and decide which paper I like for which room. Once I have decided I will post better pictures of the papers that I choose. What do you think of the paper choice ?

Sunday, March 13, 2011

Stairs

Well, today I decided to tackle the job of putting the stairs together. There are two sets of stairs in the house, from the first floor to the second floor and the second floor to the third floor. Seems simple enough, BUT...I have been doing some reading online and have read many horror stories about the stairs. Knowing that I can't really proceed until the stairs are in, I can't put it off.....I tried stalling. Noticed there were some gaps here and there and decided to do some spackling. I love the spackle that I have. It's called DryDex and it goes on pink. Then when it's white, it's ready for sanding and painting. I mostly love it because it's pink.........


.........anyway, the stairs. So I started punching out the pieces for the stairs, and of course they are not all on the same sheet.....they are all over the place. I felt like I was on a treasure hunt, I've never been so excited to find a piece of wood, but honestly it's like an Easter egg hunt. Did I mention before how horrible the wood is....well actually most of the wood for the stairs was in good shape, except the risers. They were bad. Here you can see how splintery it is.


Putting the stairs together is time consuming and you have to try to keep it square while doing it. While it was drying I placed it in the house where it should sit. I figure that ought to keep it square enough.


After lots of sanding and gluing and taping and waiting, the first set of stairs are done. This literally took me hours....and it was not even a fraction of how bad I thought it was going to be.


My plan was to start on the second set, but as I was punching out a riser, a splinter of wood hit me in the eye. That kinda killed the mood......until next time.

Saturday, March 12, 2011

Organization is KEY!!

It's not news to anyone that really knows me that I am not the most organized person. I like to think that I am but I can never find anything.....I usually have organized chaos but even that lately is not all that organized.


So I decided that before I go any further with any mini projects I need to clean my craft room. Or at least organize it enough that I know where everything is. Here is a sample of what my desk looked like prior to starting the clean up. Prepare yourself. It's pretty bad.


That big brown thing is supposed to be some way to organize, with all it's little drawers and all.....FAIL !


And here is what my desk looked like after the clean up.......so pretty. Hope it stays that way !

Friday, March 11, 2011

Construction Begins.....

I've always been a very impatient person. Miniatures is no exception.

So here was the box (very large and heavy), sitting in my dining room just waiting to be opened.


Once open I sorted through 17 sheets of very rough splintery wood. I renumbered the sheets with a black marker because the perforated numbers are very hard to see.


I decided not to follow the instructions as they are. They called for window making and attachment as the first step. I like to do windows last because it makes it easier to wallpaper the interior. I would not suggest everyone do this, but because I have made houses before I just know that for me this is easier.

I decided not to stain the floors in the house. Mainly because the wood on all three floors are clearly different. Staining it would have created different coloured floors and that would be something that would drive me insane!! So I went ahead and sealed all the wood.


Before actual construction I made sure that I had my building permit on site. Don't want to get into trouble with the city. As well, made sure my fire extinguisher was on hand. With all the heat that is being created by all the sanding going on, better safe than sorry. Which brings me to sanding.....and sanding....and sanding.....I have come to the realization that there will be no end to the sanding. Once I think I have it all nice and smooth another splinter pops up. So there comes a point where I have to stop or I'm going to be sanding till there is nothing left.

This is day one of this project and I am already exhausted.....I mean just putting the body together you need to be a 8 armed contortionist.....it was like a giant wooden pretzel. I had to get my mother to help me. There was glue everywhere....even on my arms.....MY ARMS !!!
I thought it was going to take a miracle to put this thing together, when suddenly everything just clicked. All the pieces snapped into place. And it was time to stop for the day. I'm exhausted.

Related Posts Plugin for WordPress, Blogger...